I've always used vi-logger from within the vSphere Management Assistant to deal with my syslogging of our ESXi servers, that is until our last upgrade to vSphere 5. The vi-logger command is no more within the 5.0 version of the VMA so I began looking from some alternate solutions. Now I could of went out and used a Kiwi product or Splunk or configured a Linux box to do our syslogging, however I thought i would give the vSphere Syslog Collector that is bundled with the vCenter installation media a shot. Honestly I don't find syslog to be a real science. You centralize the log files, not a big deal, but having a solution all from one vendor is kind of nice. The vSphere Syslog Collector does exactly what it says; it collects the log files from the ESXi hosts, but it also gives you some status information from within a vCenter plugin as well. As well, it's a pretty easy install and config as you will see below.
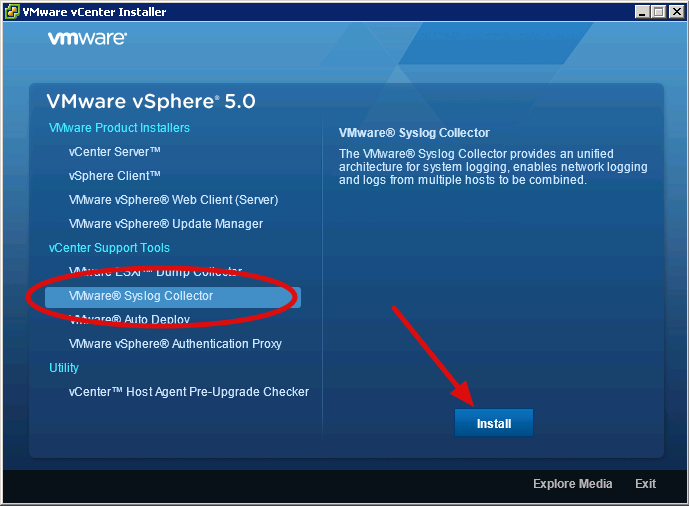
First off mount the ISO of the vCenter installer on the server you would like to act as your collector and select 'VMware Syslog Collector' and click 'Install'. During the install (and in VMware's documentation) it is called the vSphere Syslog Collector, however on the menu it's called the VMware Syslog Collector. Let's just say VSC for short to cover off both names…
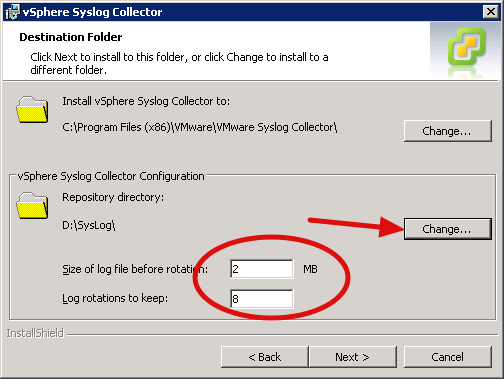
After accepting the EULA and licensing you should be presented with the Destinations screen. Here we need to do a couple of things; First, select where you want the collector application to be installed and secondly, where the logs that are collected are going to be stored (Repository directory). Also, we have the option here to chose how large we want the log files to grow as well as the number of rotations to keep. I left all of these values at their defaults, except for the repository directory as I wanted to place this on some lower level, cheaper storage.
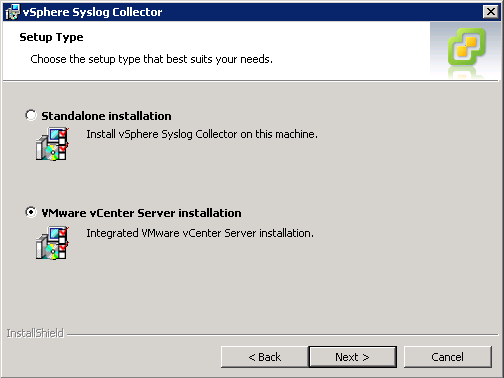
Next we need to chose a setup type. I chose to go with VMware vCenter Server installation as I wanted to integrate this with my vCenter instance. Otherwise, you can chose the 'Standalone Installation' option.
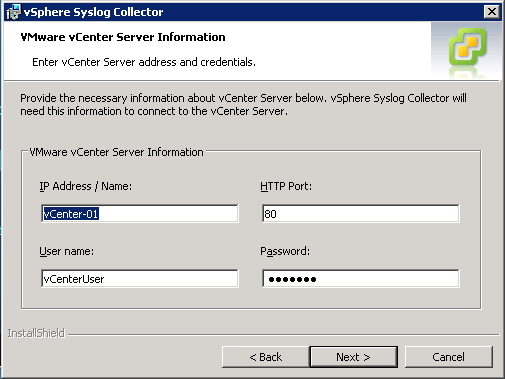
After selecting your setup type, if choosing to integrate with vCenter you will need to provide login credentials to your vCenter Server. For the most part this should be pretty straightforward.
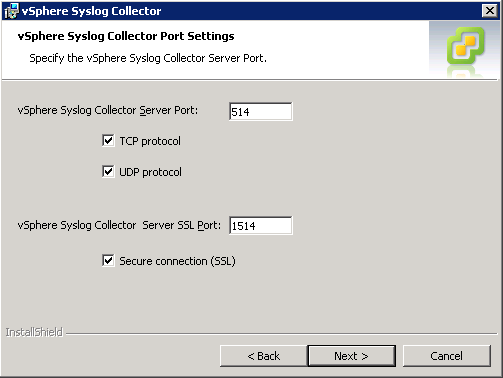
Next up is ports and protocols. Again, I left all of these at default, however you may wish to change the ports that the syslog collector operate on.
Then it's just matter of specifying how it should be defined on the network and letting it install…
So that's it, the collector is now installed. One more step, we need to tell the desired hosts where we want to ship their logs to. This can be done in a few different ways, all accomplishing the same thing, but, to each his own, here are the methods that I'm aware of.
1. The GUI – for the non command line type people.
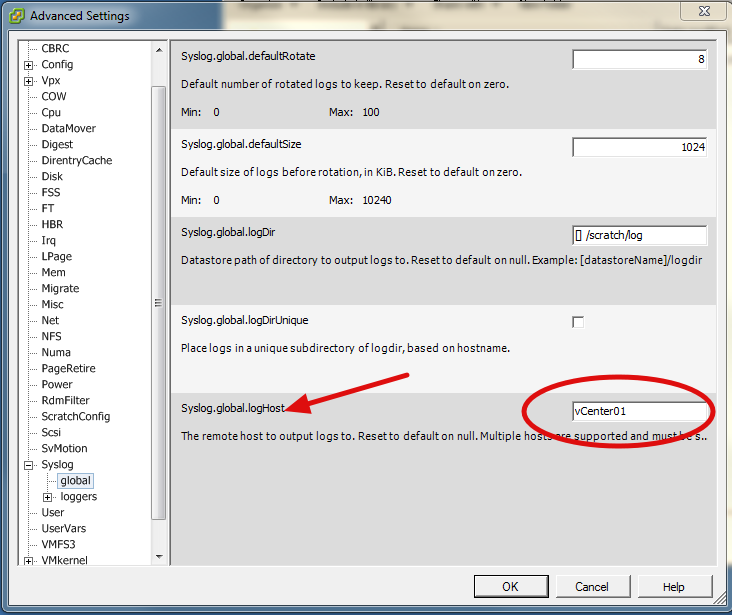
Select your desired host which you want to syslog. Go to Configuration->Advanced Settings (under Software)->Syslog->Global. From here it is as simple as setting the hostname or IP address of your syslog server in the syslog.Global.LogHost option.
***Updated April 2012***
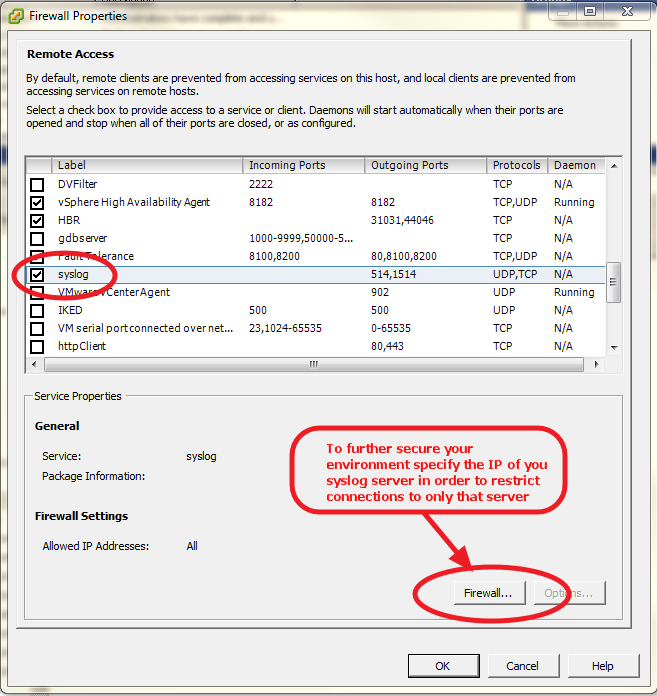
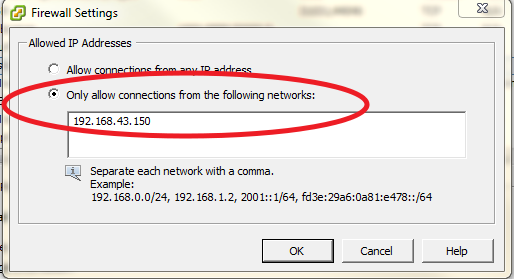
Also, be sure to open up the syslog ports within the firewall built into ESXi itself. Go to Configuration->Security Profile and click 'Properties' in the Firewall section. It can be as simple as just checking the box next to syslog, however if you would like to further secure your environment you can click the 'Firewall' button at the bottom and specify which IP address/networks are allowed to connect through these ports.
2. The ESXi Command Line space
Using the following two commands you can do the exact same thing as explained in #1.
esxcli system syslog config set –loghost=vCenter01
esxcli system syslog reload
Updated - And the firewall commands to open up the correct ports and restrict access to your syslog server.
esxcli network firewall ruleset set –ruleset-id=syslog –enabled=true –allowed-all=false
esxcli network firewall ruleset allowedip add –ruleset-id syslog –ip-address 192.168.42.150
3. Host Profiles
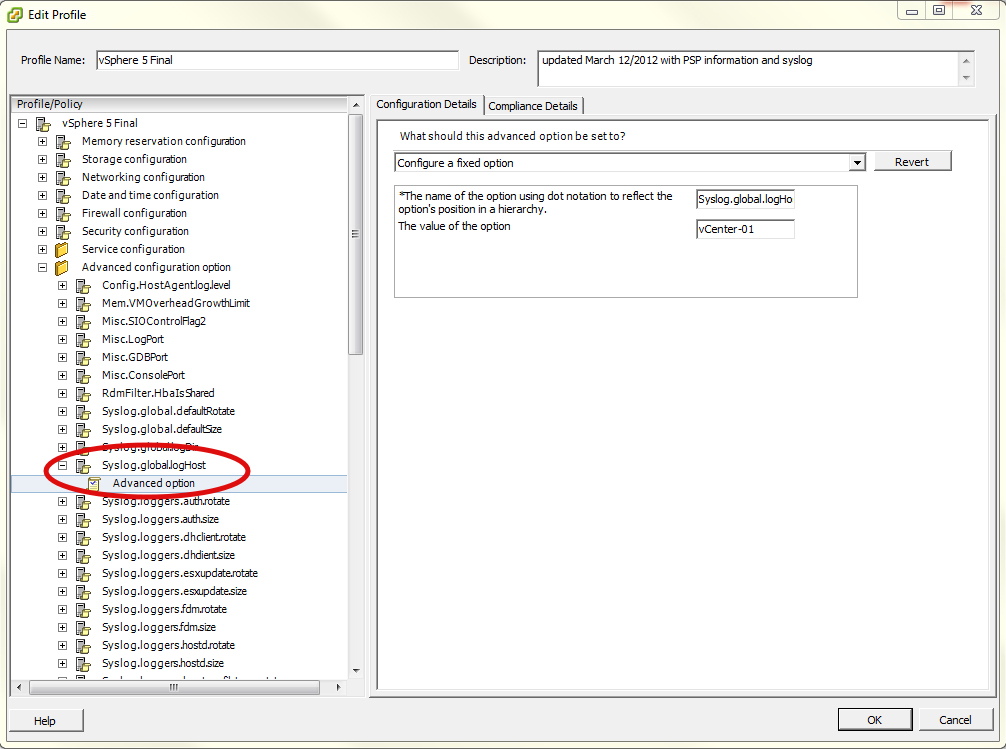
For those with larger installations, you can certainly set the syslog information in a host profile and remediate that against your hosts. Those setting are located within the profile under the 'Advanced Configuration Option and the same 'Syslog.Global.logHost' option. *** NOTE*** Until you actually create a host profile from a host that has already had this advanced option setup you will not see this option'.
Updated
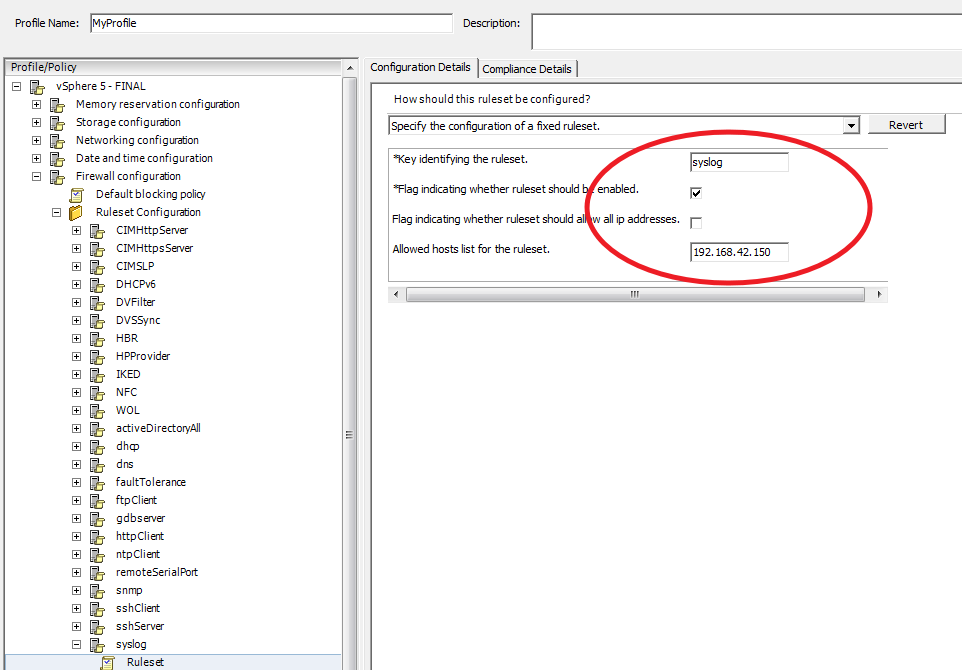
As well, don't forget to set the firewall options for your syslog server in the host profile under the Firewall Configuration -> Ruleset Configuration ->syslog – Ruleset section.
4. PowerCLI
Things begin to get a little fuzzy here. If you try to run the get and set VMHostSyslogServer cmdlets on ESXi 5 you will receive an error stating that the host isn't supported for those cmdlets, however, they still work, they still setup the syslog server. The proper way to do this through powershell is using the get and set VMHostAdvancedConfiguration cmdlets examples below. And once again, I found even this to be a bit quirky in the sense that I couldn't get the set-VMHostAdvancedConfiguration to just accept a -Name and -Value for the setup, but had to use the -NameValue pairing instead. Also I'm sure someone that knows powershell (not me  ) can rock this out on one line, but for now, this is what I got.
$sysloginfo = get-VMHostAdvancedConfiguration -Name "syslog.Global.logHost" -VMhost "IP of host that is already setup"
Set-VMHostAdvancedConfiguration -VMHost "IP of host you want to setup" -NameValue $sysloginfo
Updated
As for enabling the syslog in the firewall that can be achieved with the following command
Get-VMHostFirewallException -VMhost hostname -name syslog | Set-VMHostFirewallException -Enabled $true
But when it comes to setting the allowed IP I cannot for the life of me find a way to do this…I'll update later if I do, or if you do, please let me know in the comments. 
So there you have it! A fully functional instance of the vSphere Syslog Collector. As always comments, questions, concerns, rants – put'em in the comments 


